VLC, a popular open source media player for multiple platforms including Linux, was said to have a vulnerability that was left unpatched from about a year ago by a German researcher. The vulnerability was supposedly not even published to the VLC bug tracker itself but rather a third-party and it appears now that the vulnerability is actually a case of sensationalism. The president of VLC or VideoLan, Jean-Baptiste Kempf, stated that the vulnerability patched a year ago and thus could not be reproduced by him and his team in the latest release. The application version is at 3.0.7.1 at time of writing. Kempf also stated that the researcher was possibly using an outdated version of Ubuntu, citing a possible flaw found in a third-party library relating to VLC several months ago. This too was patched. Multiple articles and youtubers have commented on the hype, none of which seem to add anything new, however, an article on Slashdot says otherwise. The full article will be below.
ANTERGOS COMES TO A CLOSE
In a recent tweet on the project’s twitter page, the team behind Antergos recently announced that it would be discontinuing the project. While this came as a big shock to the community, the developers described this is a bit of a long time coming as things in their lives became hectic and the project has become somewhat stagnant, not seeing much in the way of features or major improvements above standard Arch based software packages. The project was founded directly on Arch Linux and thus the Arch specific packages will be updated forever, however, many changes are soon to take place to make this a smooth transition. The Antergos repository will be the first to go, moving many packages over to AUR and making the repository itself obsolete. It is unclear as to whether the project will cease to install for new users, but that is a safe bet. Antergos started as Cinnarch and has always been mainly an Arch installer with many extra bells and whistles, but it appears that this ever evolving distribution will be closing its eyes for good. Many new-to-Linux users will want to look elsewhere for an installer for Arch Linux. The forums and wiki pages will remain active for the time being as to help users during the transition, but this too will end eventually. For those who are new to Arch and just want an easy installer, Manjaro is a similar option. Other options include; Archlabs, Archman and Archbang, to name a few. It’s very sad to see the project die, but where one door closes, another opens. Who is to say what will be on the horizon for a future replacement to Antergos. The team have provided the still working source to anyone who would like to pick up where the project left off and/or take things in an entirely new direction.
The original post: https://antergos.com/blog/antergos-linux-project-ends/
SOLUS 4 FORTITUDE RELEASED
Solus, an operating system with a rather colorful history as Solus OS, having been based on Debian at one point, is now released as a rolling distribution, most recently in the form of Solus 4.0 Fortitude. Solus 4.0 took a while to reach release due to changes in project management and various other matters. Solus 4.0 uses the latest software packages and updates in a timely fashion. The software that comes pre-installed is very sparse, meaning that users should go into Solus expecting to install other software. The package manager is a forked version of Pisi which is called Eopkg. Eopkg is not based on deb or rpm package managers so getting deb files to work might be a bit of a hassle, nevertheless, most software that newer users might find useful should be either within the standard Solus repository or the ever growing third-party repository. Snapd is also pre-installed and readily available for those who want software that isn’t in either of these. Solus 4.0 also uses one of the latest lts branch kernels. The distribution has three main desktop environments, including Mate, Gnome and Budgie with KDE Plasma in development. One of the most notable changes is the new standard dark theme in this new release. As a rolling distro, Solus doesn’t require existing users to reinstall, simply running updates should suffice, however, if you feel like you need to refresh an existing partition with a new piece of eye candy, this release will definitely cater to that. With budgie being bumped to 10.5, there is better usability and more customization to Raven and the panel. The team behind the distro released this version to tie into the new Budgie version 11 coming later this year. Budgie 11 will be a complete rewrite using qt elements in place of Gnome or gtk ones. For those Gnome lovers out there, don’t be worried, Gnome will upgrade to 3.30 by then as well. As with the previous release, the default browser of choice in this distribution is Firefox, however, users who want to use an optional one may choose from either Vivaldi, Vivaldi-Snapshot, Google-Chrome or Google-Chrome-beta which are all present in the repositories, but also you can install unsupported browsers like Waterfox, Basilisk and Pale Moon. The distribution is based out of Ireland and is independent and from scratch. Users of this distribution will be happy on Intel and AMD cpu’s and gpu’s as these are directly supported. Nvidia in my own experience, especially older systems are harder to install to, but don’t let that discourage you from trying. Solus is a great distribution and is off to a really good and fresh new start with all the changes taking place.
Coinhive has shut its doors for good: Gathering your stocks by April 30th.
Fare thee well to the misused ideas of others. Coinhive, a crypto-mining operation being used in the place of embedded javascript ads on websites is closing its doors for good. Coinhive was a nifty idea, but sadly, it was abused and was really easy to abuse. After a while on the net, the service was used by malware developers and ad writers to harness users’ hardware in an attempt to mine for bitcoin. Bitcoin is a lucrative piece of virtual currency that costs bundles more than the name appears to be worth. With one coin equating to a whopping $3,854.92 (roughly?), it is little wonder why someone would attempt to cash in on this platform. Many honest or at least semi-honest people mine for currency on the web with no ill intentions, however, this misuse of the ads platform is just another reason that people use ad-blockers. Malwarebytes, a trusted malware researching team, already blocked this type of advertising, (or should we say malvertising?), in their programs and hosts files. Along with the misuse and mistrust, Coinhive also mentioned other reasons as to why they were shutting down last month. According to the company, it was also a crash in the biz. A recent fall or dip in the stock prices of the currency caused hardships for them. While this month, March, will be the end of the road for the service, the users of the service have until the end of April to gather all their stocks and withdraw. That said, many security researchers seem rather overjoyed at the shutdown as it at least appears to slow the hackers who relied on it down quite a bit. While this story isn’t breaking news, the service only shutdown officially on March the 8th. Among some of its users, apparently the Pirate Bay had stock in the service as well.
SWAP FILES ON LINUX
The Swap partition is something that is debated by computer enthusiasts today within Linux. The Swap partition allows the system to suspend when not in use, hibernate, and it is instrumental in swapping out pages when RAM space is sparse. Swap is the block of space reserved on a hard drive/solid state drive that allows caching when the memory is filled during heavy read/write jobs or during normal use when such an event occurs. Regardless of how much RAM you might have, it is a good idea to at least have one an half times that in swap, however, it is possible to run your computer just fine with the bare minimum of 2GB of swap. Swap is reminiscent of the Windows Page file, however, Windows usually creates a separate file for hibernating and suspend called Hiberfil.sys.
Also known as virtual memory, Swap files are small portions on the hard disk which do not count as a separate partition, however, they are bits of space cordoned off by the command fallocate –length swapsize /swap file(Screen shots below). This cordoned off space lets the system use everything but that space for storage, but it sets that apart to use in the event that a program or multiple programs take all of the available space in memory, this isn’t the same as taking all the memory as the system also sets aside a cache of RAM for its own purposes. The larger the desktop, the larger the amount of RAM it might set aside. Windows and Macs do this also. The RAM set aside is mostly for the Kernel space. Kernels these days attempt to use as minimal an amount as possible, however, today, most computers contain anywhere from 16GB to 64GB of Memory or more depending upon their use case.
Issuing the free command or free -h will allow you to determine how much memory/swap is being used on your Linux device. Using the command swapon -s will alert you to the device or partition that is being accessed as swap. Usually swap will come with a priority as well. This priority tells the Linux kernel to use the device with the highest priority first, much like a first come, first serve sort of thing, although, this setting can be manually changed by the user with swapon -p followed by the number. Swappiness is another factor to take into consideration when creating the swap file. Will my system use the adequate amount of memory before swapping to the disk? Swappiness in Linux desktops usually start at around 60 percent. This is too much for modern desktops and old ones alike. Setting the swappiness value lower is key for greater performance over all, when using a small swap file, it is recommended that the swappiness is set to something like 5 or below. Swappiness can be set from anywhere from 1 to 100 so using the lowest number possible is best.
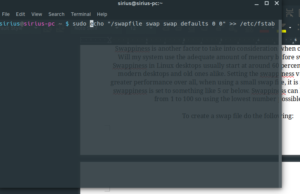
To create a swap file do the following:
![]()
![]()

Then to make it mount at startup:
I recently added a function in my scripts that do this for you should the distribution not do it automatically at install. You can find those here.
Snap Packages In Linux
When installing a snap package in Linux, Ubuntu users have snapd, a snap daemon, already installed into their system. This means that as of 18.04.x you can now install snap packages as sudo snap packagename. Snaps make it easy to install a package with all of its current and up-to-date dependencies. Snaps run in containerised sandboxes so security is a priority and malware packages can’t actively change the system without user approval. Previously, a Linux user was tortured by broken packages or unmet dependencies. This is quickly becoming a thing of the past. With so much support for the new package management system, users of all distros and desktop environments can take part in having the latest and greatest software at their disposal. Even Windows is getting interested in this marvel of the modern age of computing.
Manjaro and Arch users may not yet automatically have snapd installed, to ensure that it is installed on your system using pacman, type <sudo pacman -S –noconfirm snapd> in a terminal. Snap is a repository where vendors directly upload their finished projects. Opera has recently uploaded all of their desktop browser versions to the snap store.
-
To list a package by name, type <snap find packagename>.
-
To install a package, type <sudo snap install package>.
-
To revert or downgrade a package in snap, type <sudo snap revert package>.
-
To update a snap app, type <sudo snap refresh package>.
-
To uninstall a package in snap, type <sudo snap remove package>.
-
To make a list of all packages installed through snap, type <snap list >> snap.txt>.
Snap is still in the works, so some distros will be hesitant to adopt it, but the number of packages is increasing. Chances are that a package you use is installed in the new snap repository. Users who are also developers can benefit from snapcraft a new way for people to build their own snap apps.
To Learn More: https://www.linux.com/learn/intro-to-linux/2018/5/get-started-snap-packages-linux
To Visit Snapcraft: https://snapcraft.io
Bash Scripting Tutorial #3: User Input
User prompting can be done in at least a couple of different ways in bash. User prompting is useful when you are drafting a project or an important scripting job for someone else to use to successfully complete a task. When collecting user input, the input is placed in a variable(see last article) and then the value of the variable is implied when the variable is called later in the script. Multiple variables can be specified in the read line, this will allow for more than one answer to the script’s question. Some examples of situations where this would be useful would be when your client needs to sort and review large text files or spreadsheets by the information in the files. Linux has commands for sifting through and sorting data, but to appy it in a script, the script has to know what files to look through and what to do with said information. Another useful example is when creating a simple bash cli game to pass time at work when you should really be doing something but you’re just not feeling it. Also, this technique is useful when collecting and parsing information about a client or employee. A simple example would be the following:
echo “Enter your name”
read name
echo “Enter your birthday”
read birthday
echo “Hello” $name “your birthday is” $birthday
Where as name and birthday would be the information you entered when prompted. This is known as a sequence of STDIN and STDOUT or standard input and standard output(Input being what you entered and Output being what was pritned to the screen after all the information had been gathered). Another prime example would be merely using a read line like:
read -p “Enter a series of potential baby names”: name1 name2 name3 name4
cat $name1 >> babynames.txt
cat $name2 >> babynames.txt
cat $name3 >> babynames.txt
cat $name4 >> babynames.txt
This script will prompt the user for babynames that they are considering and will simply save them to a list of names in a file called babynames.txt. In this we are redirecting the STDOUT to another file rather than displaying them to the screen briefly before losing them. This, unfortunately only allows for four names. To add four new names or one name over multiple iterations, one would most likely want to use the first method in a loop(more about these later). Next we will be looking at if statements.
These guys have even more useful examples:
https://bash.cyberciti.biz/guide/Getting_User_Input_Via_Keyboard
Bash Scripting Tutorial #2: Declaring Variables
When writing scripts, it is often important to use and declare variables. Declaring variables is super easy. There are multiple ways to declare them, but they each work the same way. One way that I often employ is to prompt users for their input, place said input in a variable, and then use the variable to tell the script what the user wants. By this method, I am using the variable as a wrapper for something else. Variables are great for projects in coding where you really don’t know what the output of the variable will be, but you know what you want the variable to do. Other commands can be used as value for variables and declaring a word or a number as a variable and giving it value allows the echo command to print that value to the screen when typing echo $variable. A good example of declaring and calling a variable would be opening a terminal and typing var1=$(cat filename | grep “RandomPattern”) then typing echo $var1. Typing echo with the variable name will result in the value of that variable being displayed. Filename is just an example as we didn’t actually call an actual file with anything inside it. Grep would have looked for the specified pattern in quotes and that would have been the value. Another example would be:
num1=1
echo $num1
My output in this scenario would be the number one. Variables are often the first thing you learn in programming classes as these are used throughout whatever project you are trying to accomplish. While scripting languages are different from Java and or C, the idea is roughly the same. Across environments, these variables are declared and used in roughly the same ways. Python to Bash to Ruby, they all use them. A final example will be an excerpt from one of my own personal scripts.
echo “Enter the name of any software you’d like to install
read software
This example relies on the user to give input and then uses the read command to register that input as the value of the variable known as software. When the command continues it would run similar to this:
sudo pacman -S –noconfirm $software
Where the above command would install all software specified and stored in $software. Variables can encompass values that are classified as Integers, Strings and booleans. Booleans can be either True or False for the value. Unlike other variable types, these variables are best suited for a case where the outcome of a scenario is uncertain. The previous examples were of integer and string value respectively, but now it is time to see a True/False boolean variable in action. An example of a boolean variable would be this:
while True; do
some command
break
done
Another form of this would be:
find /etc/hosts.bak
while [ $? -gt 0 ]
do
sudo cp /etc/hosts /etc/hosts.bak
break
done
This form looks for the file /etc/hosts.bak. If the file is not found, in this case, if the scenario is false it will continue to create the file and then break out of the loop. If the value were True or “0”, It would have simply returned the file name in question. We will get further into this and While loops at a later time.
Bash Scripting Tutorial #1: INTRO
When performing command line tasks or (CLI) jobs in Linux, it can become tedious when there is a lot to do, for instance, working as an administrator for a small/medium/large company. Automation is very helpful when parsing large files or running multiple commands at once more than one time a day. Scripts are basically text documents that run a series of commands in succession of one another. Think of it as writing for a play. Scripts use the #! sign at the top, this is known as a shabang. The shabang alerts Bash that the following text document is a script and should be ran as a succession of lines as such. The environment comes after the shabang like so: #!/bin/env/ replacing env with the environment the script is to be read from. Most Bash ran scripts have the environment of shell. Python and Ruby use their own environments respectively.
Bash and Shell are not usually the same things. Bash or Bourne Again Shell handles lots of commands very differently to regular shell. Shell doesn’t do well with complex tasks so for this reason, most complex scripts are written with #!/bin/bash. There are plenty of ways to do different tasks within bash, some commands are more complex for a more complex need, however, other complex code is used to show off a coder’s skills. Writing code in any sense tells a bit about the one writing it. Their thought processes and so on. When a developer of an os sets certain scripts to be ran from the system’s back end, many of these scripts use Anacron as a scheduler and they use #!/bin/sh as the environment. These scripts are usually found in the /etc /cron.daily monthly or weekly folders. These scripts usually consist of one or two lines to do tasks like updating the local database and updating man databases or rotating logs around.
Bash is good for most needs, however, it is imperative to plan out your next script with the job in mind. What am I trying to accomplish? Will this deal with numbers or strings? How will this work automated? In the next few tutorials I will go over some basic syntax for everyday commands. I will even talk more about Systemd timers and scheduling.
TOP 10 LINUX SOFTWARE I LOVE
As I stated previously, there is no shortage in software for Linux. Each task seems to have more than one really good application. Here I will go over 10 things I can’t do without/ or software I’ve read about and really am interested in. No specific order. I will follow up with a 10 Open Source Software I Hate article later.
-
VIVALDI: There are a few good ones out there. Anyone can see that Linux isn’t exactly as limited as it used to be in this case. However, for my own use and purpose, Vivaldi is at the top of the list of browsers. It is built on Chromium and has the same Javascript engine, what makes it different is the interface. You can do almost anything with the interface. You can stack similar tabs, you can prioritize audio across tabs, you can hibernate background tabs to spare resources, something that takes a third party extension to do on other browsers.
-
DELUGE: I get it, I’m using Transmission right now, but Deluge is by far the best Bittorrent client for Linux. It’s open source, cross platform, and has all the essentials you would need. Most of these “essentials” are in the form of extensions or plugins. These can be turned on pretty easily within the settings. These include; blocklists, bandwidth control scheduler, auto add, and more. Deluge has some similarities with Qbittorent, however it is a QT application. Deluge works better with gtk based desktops, at least for me.
-
PAROLE: Media codecs are extensive these days, there is no doubt that VLC at least used to be better at playing DVD’s, however, nowadays, I can play most DVD’s on my Linux machine by using Parole. Parole also doesn’t have all the specific quarrels about Qt plugins as does VLC in Manjaro for instance. Parole started back into development not long ago, after it was unsure about the future of said application, its developers finally released a new stable update to the prized application that favors Xfce desktops over anything else. It’s very light weight even in comparison with VLC.
-
GEANY: I have a lot of fun learning code. It’s not just the satisfaction of feeling like a hacker whilst typing away at my keyboard, it’s the feeling of solving a problem or otherwise making something more accessible. Whether I’m writing scripts for Linux, learning to write something basic in C or Java, even if I’m drafting something in HTML, it doesn’t hurt to have a good IDE/text editor that can handle the job. Geany(pronounced genie), is such an application. It highlights code and handles an array of programming and markup languages right out of the box. Another runner up would be Bluefish, but it’s more tailored to just HTML. Most people complain that the white background hurts their eyes, but no one realizes that there is a way to invert the colours, I will do a tutorial on that soon enough.
-
BLEACHBIT: It’s true, cleanup in Linux isn’t an issue. While there are a few nifty utilities that do this for you, most are concerned with just how much these applications clean. There is a good reason to be nervous when using one of these applications, but most issues from running these are based on user error. An all around simple tool for cleaning cache and other debris from a multitude of applications on the system, Bleachbit is to Linux what Ccleaner is to Windows. Bleachbit is also cross platform. Bleachbit has many similarities with Ccleaner, such as its use of an ini file to tell it what it can and can not clean. Hacking of this file could result in larger lists of applications that you can safely clean, however, for regular users, the standard list is fine. Bleachbit can also shred and wipe free space clusters as well. For quick cleaning, this is my go to.
-
HTOP: I prefer this even over my own system monitoring app for xfce on most occasions. I mainly like this app because it seems somewhat more accurate. It also tells me exactly what is using how much in a way that pwns the competition. Htop is a handly cli version of a system monitor program. It uses your terminal to display process and RAM information all in one compact and neatly organized window. Htop also allows you some control of applications, much like its graphical counterparts. While it is a bit more complicated for new users, using it is pretty straight forward. Most actions rely on the function keys.
-
XSENSORS: While the xfce desktop, especially in Manjaro, has plenty of sensor information available to me with the addition of the goodies package, it just seems like a more efficient use of space to use Xsensors. Like other sensor apps, Xsensors uses lm-sensors to display CPU, GPU and other relevant temperature/voltage information depending upon your motherboard’s capabilities. Xsensors can easily be added to a keyboard shortcut. I prefer using F1 for this.
-
BRASERO: Brasero is a simplistic disc burning utility for Linux. I chose this over Xfburn, because the interface is more modern.
-
LIBREOFFICE: While neither Linux nor distribution specific, and while not the only office utility in Linux, I prefer this for its abundance of features and its integration with projects started on either Windows or Linux and in almost any setting. It has a good selection of fonts(more can be added by adding proprietary fonts to the system). It has a good spell-checker and Language database where more can be added. This relies heavily on Hunspell package being installed on the system. The default layout is what I am used to.
-
PLUMA: While I already gave my favorite editor, this is an editor of a different breed altogether. Pluma is based on the Mate desktop project. While similar applications do exist, this is firmly Mate desktop and stable, lightweight, plentiful enough in features that I can get simple and quick edits finished fast. It is rather ironic that if the system I’m on didn’t already come with Mousepad, I’d definitely install this one first.
And there we have my top 10 loved applications for Linux, stay tuned for my top disappointing apps later. Thanks!